
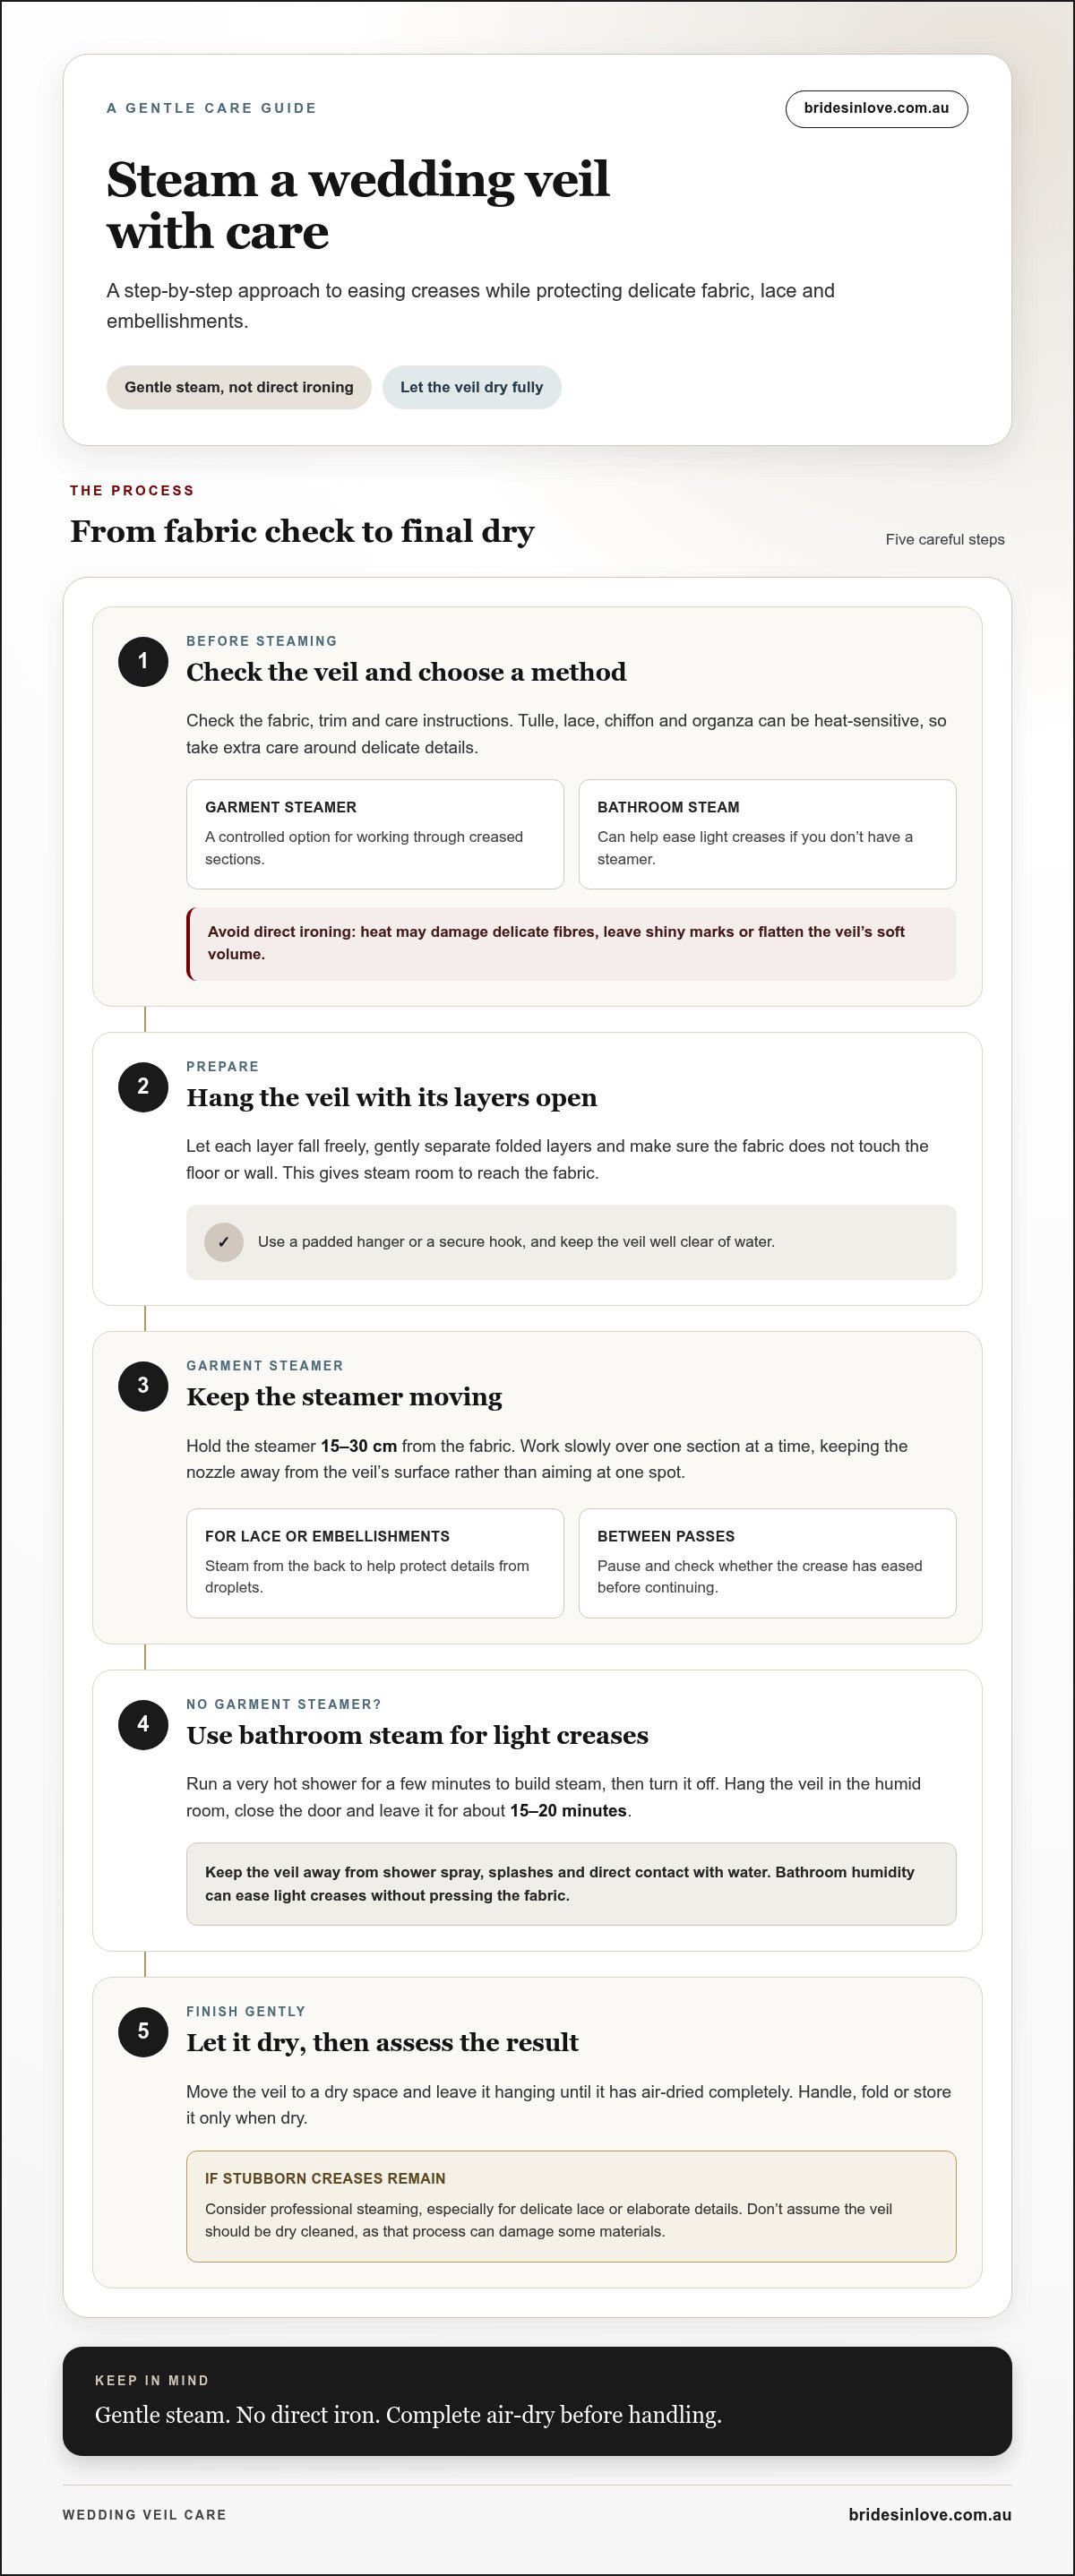
Getting wrinkles out of a wedding veil is safest with gentle steam, not direct ironing. Hold a garment steamer 15-30 cm from the fabric, and let the veil air-dry completely before handling it. Tulle, lace, chiffon and organza can be heat-sensitive, so take extra care around delicate details.
A creased veil can feel like one more wedding-day worry, especially when the fabric is fine or embellished. The good news is that careful steaming and patient hanging can help ease wrinkles without flattening the veil’s soft shape.
This guide explains how to assess your veil’s fabric, use a steamer or bathroom steam safely, and keep it crease-free before the ceremony. You’ll also learn what to do if wrinkles remain and how to handle and store your veil with care.
Key Takeaways
- Use bathroom steam to ease stubborn creases, keeping the veil clear of water and letting it dry fully before handling.
- For lace or embellished details, steaming from the back can help protect the decoration from droplets.
- Avoid direct ironing: heat can damage delicate fibres, while pressing may flatten the veil’s soft volume.
- Hang the veil open on a padded hanger ahead of the wedding so gravity can help release minor creases.
- Store it in a cool, dry place in a breathable garment bag or wrapped in acid-free tissue to help prevent fresh wrinkles.
What If My Veil Is Still Wrinkled?
Use gentle steam to relax creases, then let the bridal veil air-dry completely before handling it. For lace, steam from the back. For stubborn wrinkles, consider professional steaming rather than ironing directly.
-
Choose a wrinkle-removal method
Start by checking the veil’s fabric, trim and care instructions, then choose bathroom steam or a garment steamer. If you don’t own a steamer, bathroom humidity can help ease light creases without pressing the fabric. Avoid direct ironing, which can leave shiny marks or distort lace. For a hairdryer, choose low heat or cool air and keep it at least 12 inches away.
-
Use bathroom steam to relax wrinkles
Hang the veil in a steamy bathroom for about 15-20 minutes, keeping it well away from direct contact with water. Close the bathroom door so the steam can settle around the fabric, but don’t hang the veil where shower spray or splashes can reach it. Afterwards, move it to a dry space and let it air-dry completely before handling, folding or putting it away.
-
Steam the veil without causing damage
Hold a garment steamer 15-30 cm from the veil and keep it moving, rather than directing steam at one spot. For a lace wedding veil or one with embellishments, work from the back to reduce the chance of droplets affecting the details. Treat one section at a time, then pause to see whether the crease has eased. Don’t iron directly over lace, beading or other decoration.
-
Consider professional steaming or pressing
Consider professional steaming if stubborn creases remain after gentle steaming or the veil has delicate lace or elaborate details. A tailor or professional dry cleaner can steam a wedding veil, but steaming is different from dry cleaning. Don’t assume the veil should be dry cleaned, as that process can damage some materials. Point out the most creased areas, lace and embellishments.
If a lace border still looks crumpled after steaming, avoid pressing it directly with an iron. If pressing is necessary, place a handkerchief or light fabric over the lace as a barrier. Let the veil cool and dry before checking the result. Stop if the lace or fabric changes shape, as more heat or pressure may flatten the veil’s soft volume.
Using a garment steamer safely
Before steaming, check the veil’s trim and separate any folded layers. Keep the steamer moving, and use a barrier if pressing becomes necessary.
-
Steam the veil with a garment steamer
Hang the veil so each layer falls freely, then hold the steamer 15-30 cm from the fabric. Move slowly over one area at a time, keeping the nozzle away from the veil’s surface. For a lace or embellished section, direct steam from the back to help protect the details from droplets. Pause between passes and assess the fabric before continuing.
Keep the steamer moving instead of concentrating heat on a single crease. If a fold remains, let the area settle before making another pass. This lets you see whether the wrinkle is loosening without repeatedly steaming the same section.
-
Press lace borders with care
After steaming, check the lace border and identify only the creased area that needs attention. If steaming hasn’t eased a stubborn fold, place a handkerchief or light fabric over the lace before pressing. Keep the iron off exposed lace, beading and embroidery, since direct contact can leave shiny marks or deform delicate details.
Use an iron only if the covered lace still needs gentle pressing. Work on a small section, then lift the protective cloth to inspect the result. Avoid repeated pressure, which can flatten the veil’s soft volume and change how its border sits.
- Keep direct heat away from the veil, even if the iron is set to low. Direct ironing can damage delicate fabric, deform lace or embroidery, and melt, shrink or burn synthetic fibres in tulle and netting. Whenever ironing is necessary, place a pressing cloth between the iron and veil.
For a lace edge, make the protective layer wide enough to cover the section beneath the iron. Don’t slide the iron over uncovered areas as you reposition the cloth. Lift and move the barrier between sections, then inspect each area for changes in texture or shape.
- Finish by checking the veil’s full length, including its edge and embellished sections. Compare treated areas with untouched ones to spot flattened volume, shine or distorted lace. If a stubborn crease remains, don’t keep adding pressure or heat. Repeated treatment can affect the fabric more than the original fold.
After steaming or pressing, leave the veil hanging until it has air-dried fully. Handle it only when dry, and avoid folding it while checking the result. This pause helps prevent fresh creases as you move or store the veil.
Creating steam with a hot shower
A hot shower can create steam to ease light creases if you don’t have a steamer. Keep the veil away from shower spray, and let the fabric dry fully before handling it.
- Choose a bathroom where the veil can hang freely, clear of the shower and taps. Use a padded hanger or secure hook, and let the fabric fall without touching the floor or wall. Gently separate any folded layers so steam can reach both sides rather than settling on one compressed section.
- Run a very hot shower for a few minutes to build steam, then turn it off before bringing the veil into the room. Hang the veil where humid air surrounds it, away from droplets. Bathroom steam is indirect, so it can ease light creases without pressing the fabric against a hot surface.
- Leave the veil in the steamy room for about 15-20 minutes, then inspect a creased area. Look at the tulle, netting or lace edge to see whether the fold has softened. If a crease remains sharply defined, don’t tug the fabric or rub it between your fingers. Let the veil hang naturally while you decide whether another method suits it better.
- For a handheld fabric steamer, hang the veil with its layers open and work across a small section at a time. Keep the steamer 15-30 cm from the fabric and move it steadily, rather than concentrating steam on one spot. For lace or embellishments, direct steam from the back to help protect the details from droplets.
- Compare the result from the shower with the result from the handheld steamer. Bathroom steam suits mild creasing across an open section, while a steamer lets you target a particular fold. After either method, leave the veil hanging until it has air-dried completely. Keep it away from direct water, and avoid folding or packing damp fabric, which can set new creases.
- If the veil still looks creased, check whether the fold sits in plain fabric or across lace and decoration. Don’t increase the heat or press directly to force it flat. A stubborn lace border may need careful attention, while a light, even crease may ease as the veil hangs. Choose your next step based on the fabric and the wrinkle’s location.
Keeping a veil crease-free on the wedding day
Plan the veil’s storage and handling for the final days before your ceremony. Hanging it open, away from pressure and damp, helps prevent fresh creases.
- Store the veil in a cool, dry place away from direct sunlight, heat and damp. Use a breathable garment bag to protect it from dust and new wrinkles, or wrap it in acid-free tissue paper. Avoid plastic bags, which don’t offer the same breathable storage. If you must fold the veil, place tissue paper between the folds to minimise crease marks.
If the veil is boxed, take it out four weeks before the wedding and hang it up. If more than a month remains and you’re no longer trying it on or showing it, return it to its box in a cool, dry place until four weeks before the date.
- Hang the veil as open as possible on a padded hanger to help prevent indentations and fresh creases. Gravity can ease minor folds naturally. Take it out of its garment bag three to five days before the wedding and leave it hanging freely. If you notice light creasing, let the fabric relax before deciding whether it needs steaming.
If the veil is already out of its box, hanging it at least one week before the wedding can help ease minor creases. Keep the layers spread rather than folded over the hanger. Make sure the comb and trim aren’t bearing the veil’s full weight, as concentrated tension can distort how it hangs.
- Zip a garment bag carefully to protect the veil during storage. Hold the zipper away from the fabric and place two fingers beneath it as you close the bag. This creates a barrier between delicate netting and the moving zip, helping prevent snags. Keep the bag in a dry wardrobe, not a damp area.
- Put the veil on after hair, make-up and jewellery, as the final accessory. This reduces handling while you get ready. If the veil is long, wait until you arrive at the ceremony site before putting it on. That way, you won’t sit on it in the car, where pressure can cause damage or new wrinkles.
On the morning of the wedding, clip off the veil’s ribbon loop, which is intended only for hanging. When removing the veil later, ask someone to place a hand above or below the comb and ease it out gently. Avoid yanking the comb, which can pull the fabric and disturb your hairstyle.
Assessing veil fabric and heat sensitivity
Identify the veil’s fabric and details before choosing heat or steam. Tulle, lace, chiffon and organza need careful handling because they can be heat-sensitive.
- Check the fabric label or purchase information to identify whether the veil is tulle, lace, chiffon or organza. These materials are common in bridal veils, but their construction and trims can differ. Inspect the full length, not just the comb area. Plain tulle and an embroidered lace border may need different handling, even on the same veil.
- Inspect embellishments before applying steam or heat. Look for beading, embroidery, sequins, appliqué and delicate lace, and note where each detail sits. For a veil with a lace edge, for example, steam from the back to help prevent droplets from affecting the decoration. Keep the steamer moving and don’t direct heat at one detail for too long.
- Take particular care with tulle and netting around an iron. Direct ironing can melt synthetic fibres or cause them to shrink or burn. Low heat doesn’t remove that risk, so never place an iron directly on the veil. If a lace border needs pressing, put a handkerchief or light fabric between the iron and lace.
- Choose gentle steam for a veil with mixed materials or prominent embellishments. Hold a garment steamer 15-30 cm away and work across one small area at a time. For lace or decoration, steam from the reverse side. Pause to inspect the fabric after each pass, especially where a sheer panel joins a heavier trim.
- Stop if the fabric changes shape, develops a shiny patch or feels unusually warm during treatment. Don’t respond with more heat or pressure. A badly creased lace border may need a protective layer before careful pressing, while delicate netting should never touch the iron directly. Let the veil air-dry fully before handling it again.
- If you’re choosing a veil to complement your gown, consider how its fabric and embellishments will work with the overall look. A bridal appointment can help you explore suitable styling options. Book an appointment to discuss your bridal look.
Wedding veils are commonly made from tulle, lace, chiffon or organza, which require careful handling because they can be sensitive to heat. Use that sensitivity as a reason to make fabric identification part of the preparation, rather than deciding on treatment by appearance alone. When more than one fabric or finish is present, consider the most delicate area before choosing how to proceed. A treatment suitable for one section may not suit another, so avoid assuming that the whole veil can be handled in the same way.
If the material is uncertain or the veil has details that make heat treatment difficult to assess, take a cautious approach instead of testing with more heat. The aim is to reduce creasing while preserving the fabric and its finish, not to force every fold flat. Recheck the material and trim before each treatment, especially when moving to another area. Assessing the veil first helps you choose an approach suited to its fabric and details.
Brides in Love: Zavana Bridal Gowns
Brides in Love offers Zavana Bridal gowns for brides planning a polished look from gown to veil. Once you’ve considered how to care for your veil, choose a gown that complements its length, lace and embellishments. Brides in Love also offers White April, Wedding Societe and Cizzy Bridal gowns, giving Sydney brides several collections to explore.
Bring your preferred veil style into your gown decision, whether it has a delicate edge or a clean, simple finish. Seeing how these details work together can help create a cohesive bridal look. To explore the collections or discuss your gown, contact Brides in Love or visit the Brides in Love website.
Make your bridal look feel complete
A considered veil choice can shape the finish of your bridal look, so include it in your gown planning. If you’re still choosing a dress, explore the Zavana Bridal and White April gowns at Brides in Love. Consider how the veil’s length, lace and embellishments will sit with the gown’s neckline and detailing.
Once you’ve chosen your veil, plan its care around the fabric rather than rushing to remove every crease at once. Gentle handling helps preserve its shape as you prepare for the ceremony. For getting wrinkles out of a wedding veil, choose an approach suited to its material and decoration.
Ready to consider your gown and accessories together? Arrange an appointment with Brides in Love and take the next step towards a look that feels right for your day.
Frequently Asked Questions
Can you steam a wedding veil at home?
Yes, you can steam a wedding veil at home. Before starting, clear a space where its full length can hang without touching a basin, shower screen or floor. Support the veil at the comb attachment rather than pulling on the netting. If it has several layers, separate them gently so you can see which areas need attention.
How to remove wrinkles from a tulle wedding veil
For getting wrinkles out of a wedding veil made from tulle, first locate each crease and check whether it follows a fold line or sits near the comb. Don’t stretch the netting taut or rub the crease between your fingers. Treat the affected area gently, then check how the tulle falls naturally. This preserves its drape instead of forcing it flat.
Can you iron a wedding veil, and what temperature is safe?
There isn’t one iron temperature that suits every wedding veil. The right approach depends on the fibres and details, such as synthetic netting, lace or embroidery. Check the garment’s care information before considering an iron. If the fabric or trim is unclear, choose a non-contact method rather than guessing at a setting. Low heat doesn’t make every material suitable for pressing.
How to use a bathroom steam shower to de-wrinkle a bridal veil
A bathroom steam shower can ease light creases, but it isn’t a way to wash or soak a bridal veil. Keep the veil clear of taps, wet towels and surfaces where condensation gathers. Once steam has relaxed the fabric, move it to a dry room and check for damp patches before putting it away. Don’t pack it while any part remains damp.
Should you hang a wedding veil before the wedding to remove creases?
Yes, hanging gives gravity a chance to ease minor creases. Afterward, inspect the veil from comb to hem and note any remaining fold lines. This helps you focus further treatment on the affected area instead of treating the whole veil again. Make sure the hem hangs clear of furniture, shoes and anything else that could catch it.


